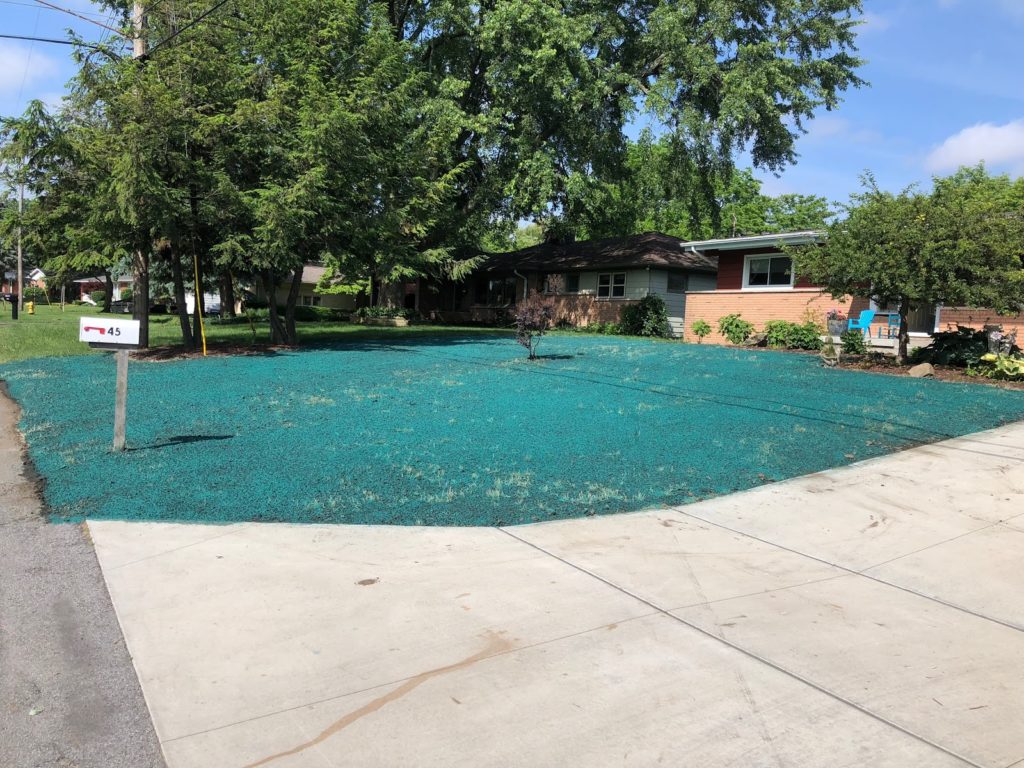
We all want beautiful, lush lawns to enjoy all summer. That means it’s time to start thinking about the best way to achieve that growth before the kids break out the sprinklers and kickball. Hydroseeding is an excellent, affordable option. For an in-depth look at the benefits of hydroseeding and tips for DIY hydroseeding, read our article Hydroseeding 101. Don’t worry, we’ll still cover all the basics in this article!
While you can start the hydroseeding process in different seasons, there are ideal conditions that allow for quicker growth and require less water. Don’t wait too long, or your backyard barbeques will be at stake.
In Michigan, both fall and spring are great times to hydroseed your lawn. Hydroseeding in spring is beneficial because of the moderate temperatures. Late summer/early fall is optimal, as the temperatures continue to fall and the precipitation increases. The spring and fall allow for faster growth than in cold and hot seasons, but won’t require as much water as a lawn that began in the drier summer season.
The ideal temperature for the first 6 weeks after hydroseeding is between 65 and 75 degrees. Temperatures that fall too far outside this window can be harsh and lead to different issues.
The hydroseeding timeline does depend on the weather, but typically, hydroseeded lawns will begin to sprout in 5-7 days. For the next several weeks, they require more care than a regular lawn.
We do not recommend hydroseeding over an existing lawn.
The best practice is to either start over from scratch by completely redoing the lawn, or implement a process called “overseeding.” Overseeding is done with a power rake (you can rent one from a hardware store) and then broadcasting seed. Press the seed into the loosened soil with a leaf rake, and add starter fertilizer and water.
A properly prepared site will make a huge difference to the resulting lawn. This includes topsoil. Most builders put down topsoil, but it is the topsoil that was scraped off the housing plot, and returned to the yard areas once the house is built. This may or may not be quality topsoil.
If your site has no topsoil, we recommend adding up to 4 inches of quality topsoil. We use a loamy topsoil mix. This soil will help provide nutrients to the lawn. If you are unsure of the quality of your soil, a soil test can give you an idea of the nutrients in the soil as well as the pH level. These results will give you an idea of what needs to be corrected including acidity and alkalinity. You can also add soil amendments and adjust fertility.
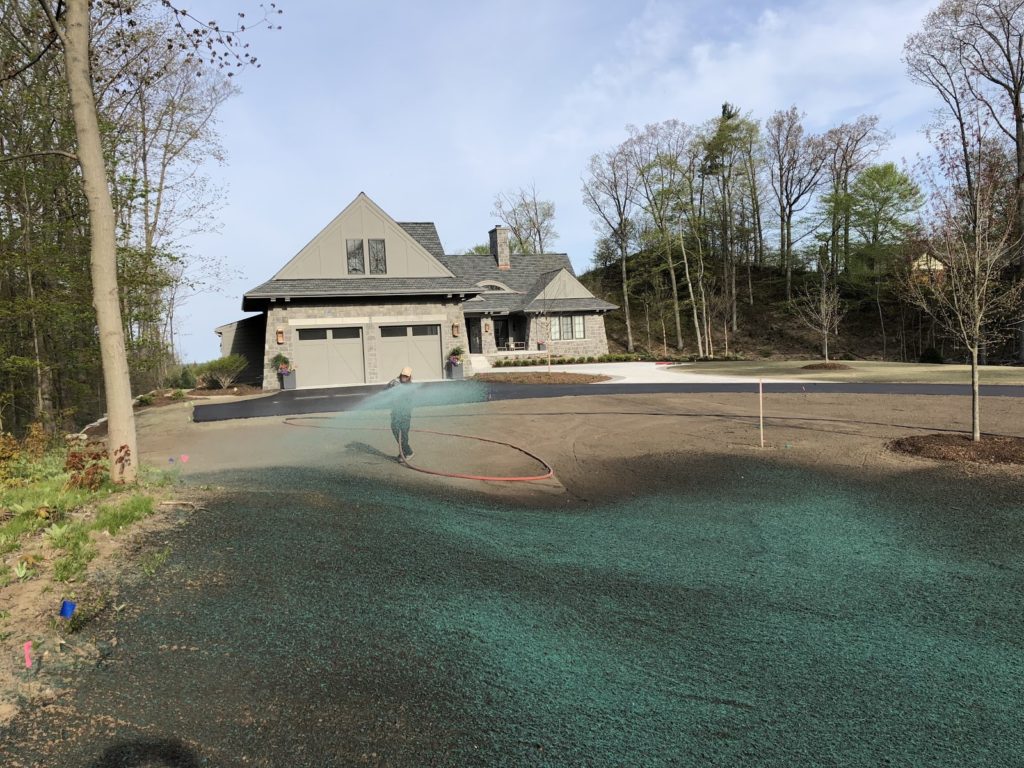
Hydroseeding is an affordable and fairly simple way to install a lawn,but involves a lot of work and can be a complicated process.
We have a step-by-step guide to DIY hydroseeding here, but we’ll cover some must-do’s and don’ts here.
DO conduct a soil test. Skipping a soil test is like skipping breakfast. While it seems like you can do without, it’s incredibly important to the health of your lawn! Soil tests can reveal pH issues that often happen on construction sites.
DO your homework. Hydroseeding “slurries” are made up of different combinations of seed, mulch, fertilizer, soil amendments, and water. These mixtures vary based on climates. What works on one building site may not work for yours. Make sure you are choosing the right mixture for the job.
DON’T wait too long. Starting your hydroseeding project at the wrong time can cause a lot of issues. Harsher temperatures (both cold and hot) can cause your seeds to fail to germinate. We recommend hydroseeding in either spring or fall in Michigan due to milder temperatures and precipitation levels.
DON’T skip watering. For the first few weeks, your new lawn will require more water than a regular lawn. It should be constantly wet for at least a few weeks.
If you are having a professional team take care of your lawn for you, you just need to tell us when to show up. If you decide to try to tackle it yourself, there’s quite a bit of preparation required.
Hydroseeding often fails because of poor preparation and soil environment. On construction sites, the soil can become extremely compacted. When this happens, it becomes difficult for water, air, and roots to break through.
To really secure your lawn and ensure its health, you should either loosen, or amend your soil. To amend soil, you will need to till soil amendments (such as decomposed organic matter like fertile compost or peat moss) into your soil.
If your soil is too rocky/impenetrable you can try the topsoil method, but add at least four inches of soil to allow for deeper roots.
Site Preparation
Taking the steps to properly prepare the site will help your new grass grow deep roots. This will ensure your lawn stays beautiful and healthy through dry summers and wet winters.
Step 1: Kill off any existing vegetation by using a herbicide.
Step 2: Do a soil test. If necessary, purchase materials in order to correct soil pH.
Step 3: Grade the area in order to avoid drainage issues. We have an article on DIY foundation drainage systems here.
Step 4: Remove any debris like stumps, rocks, twigs, etc from the site.
Step 5: Till the area. Make sure to till at least 2 inches deep, and add any soil amendments or extra topsoil as necessary.
Step 6: Finish grade and rake the surface, maintaining a loose ¼” top layer of soil for the seed to contact.
Time to hydroseed! The site should be ready.
After planting, your lawn will need a little extra TLC in order to blossom into the envy of the neighborhood.
While newly hydroseeded lawns do require extra water, you don’t want to break out the sprinklers right away! The mulch needs to dry fully before watering. This typically takes about a day, allowing the tackifier in the mulch to set up. After the mulch has had a chance to dry, you’ll want to begin your watering routine.
In the first few weeks, you’ll need to keep the lawn constantly wet. The moisture will help your new lawn germinate. A good method is to water each section for 10-15 minutes a two to three times per day. If you are experiencing run-off issues, you can reduce your watering time.
Keep an eye on the weather. If there is rain predicted, avoid watering. Temperature should affect your watering schedule too. If the temperature exceeds 85 degrees and there is humidity, avoid watering after 3PM. High temperatures can damage your lawn and lead to fungus. In the shadier areas of your lawn, give the mulch time to dry before watering again.
After your first mowing, you can start to water less often, but water for longer intervals than before. This helps the lawn establish deeper, stronger roots.
A general rule of thumb is to give your lawn 1-2 inches of water per week.
Allow the mulch to completely dry before walking on it at all. Then, avoid walking on your lawn unless necessary until after you are able to mow the first time.
Unfortunately, hydroseed is not exempt from soil erosion. While the new seeds need to be constantly watered for the first few weeks after planting, heavy rain can cause issues.
If heavy rains fall before your seeds have a chance to grow roots, they can be easily displaced. Proper site preparation can help mitigate this issue since it will speed up germination and help form deeper roots.
If your seeds are displaced due to heavy rains, you may need to reseed portions of the lawn. Make sure to follow with proper maintenance to create an even, beautiful lawn.
If your area is experiencing heavy rain consistently, your lawn may grow unevenly. Proper maintenance can help the lawn fill out evenly eventually. If your lawn is not coming in evenly, you may need to reseed areas again.
Soil erosion can be mitigated by utilizing either straw erosion blankets. They can endure intense water runoff, all the while keeping your hydroseed in its proper place. We recommend placing these blankets in swales, ditches, slopes, and large hills.
Depending on the climate, watering, and seed mixture, hydroseed lawns typically begin to sprout within 5-7 days. If you continue with proper maintenance (starter fertilizer applied 3 times every 3-4 weeks) and don’t experience any extreme weather conditions, your lawn will reach 3 inches long within a month. This is when you can mow for the first time.

Overall, hydroseeding is a great, affordable lawn solution. While it does require quite a bit of legwork if you intend to DIY hydroseed, the end result will be worth it. If the process seems complicated, it is. Hiring a professional team is always the best way to ensure your lawn takes the first time and will last. Superior Groundcover provides hydroseeding service as well as services that accompany new lawn installations, such as foundation drainage. Call our expert team today to start working on your dream backyard for this summer.